Smart virtualbox configuration with static IP and DHCP for internet
As a developer, I am required to work on different projects and each of them has got their own requirements for the environment and dependencies. One may require a combination of RabbitMQ and MySQL wherein the second one would be requiring Elasticsearch and Hazelcast. If I were to run each of these services in my local system, I would be wasting resources as these are not always in need. That’s where a virtualization solution like Virtualbox comes to rescue. I use Virtualbox to create VMs which houses the necessary dependencies/services for each project and fire them up when I am required to work on the respective project. Though this really helped in keeping my local system clean, one major issue I faced was with the IP address and internet access inside the VM’s when I switch networks. In this post, I am going to show you how to set up the Virtualbox in a smart developer-friendly manner so that you can have a static IP that you can use in your project configurations which does not change and also another DHCP configuration that shares your host internet in the VM irrespective of the network you are on.
Configuring the Virtualbox
I won’t be going through the installation or the details of setting up virtual box VM. There are plenty of resources available out there that provides step by step guide on how to do this. We will assume here that you have a VM ( Ubuntu / Centos Image ) running as VM already.
Setup a host-only network ( vboxnet ) in VirtualBox
As a first step, we need to create a host-only network in the VirtualBox. This would be used in creating the static IP for the guest VM for communicating with host operating system. To set up a host-only network, go to File Menu -> Preferences -> Networks section and click on the “Host-only networks” tab.
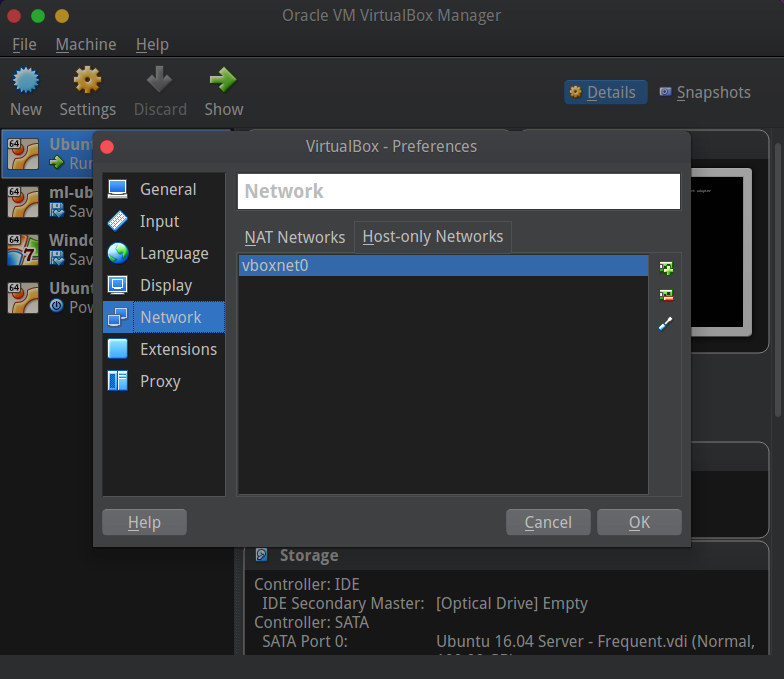
Click on the + icon to add a new Host-only network. This will open a new dialog and click on the “Adapter tab”. You need to enter the following details in the dialog.
- IPv4 Address: 192.168.56.1
- Network Mask: 255.255.255.0
You may leave the other 2 fields empty. Click on OK and that will add a new entry of vboxnet0 to the list.
At this point, if you run the command to list the interfaces in your host system, you should see an entry called vboxnet0 as below:
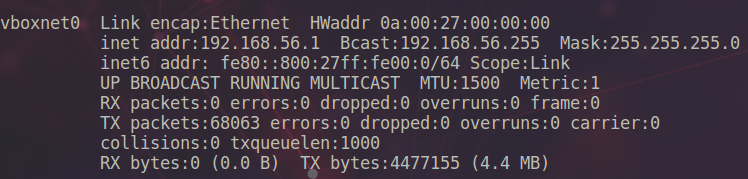
You don’t need to panic if its not immediately visible, you may try restarting the virtualbox or try launching a VM
Network setup on the VM configuration
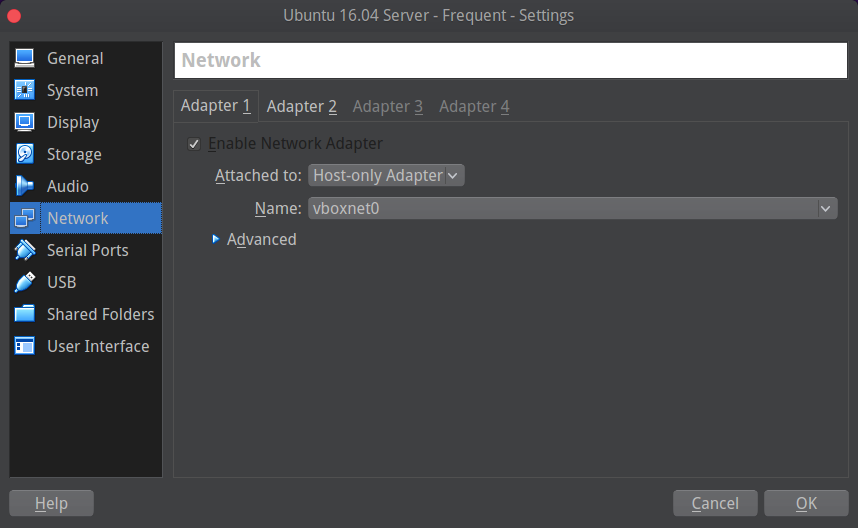
Once the vboxnet0 interface is created, we need to configure the VM to use this as a Host-only network interface and another NAT interface for the internet access. Select the VM in Virtualbox that you want to configure and click on the Settings. Now go to the network section and select the following:
- “Adapter 1” as Host-only Network and select the “Attached To” as “Host-only Network”. Now select the “Name” as vboxnet0 from the dropdown below that.
- Click on “Adapter 2” tab and check the “Enable Network Adapter” checkbox. Select the “Attached To” as “NAT”
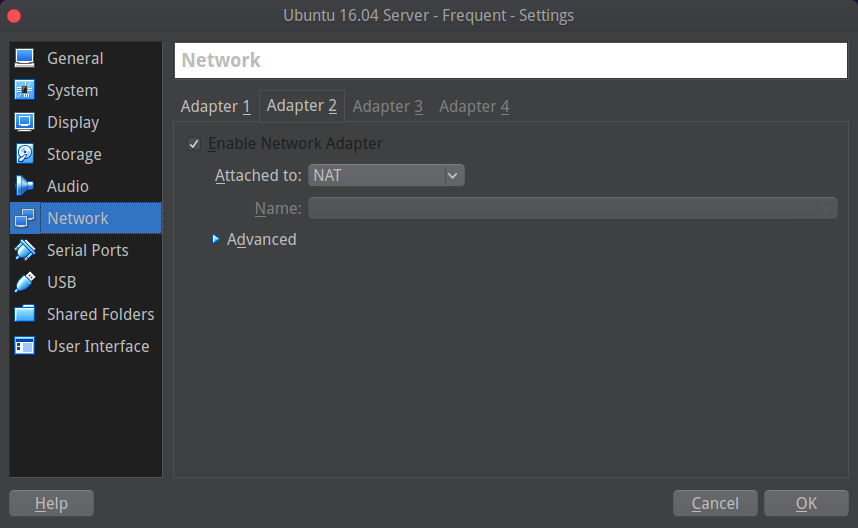
Please note that the order of selection is important here. Make sure that “Adapter 1 ” is Host-only network and “Adapter 2” is NAT. This has significance when you configure these interfaces inside the VM.
The configuration inside the VM network file
Once the configuration of the host is done in the Virtualbox, its time to start the VM and add some configuration to the network interfaces of the VM itself. Let’s fire up the VM and login or SSH into it.
Now run the ipconfig command and get the result. You should look for interfaces that start with “enp”. Here is a sample output from my VM. The enp0s3 represent the first network adapter configured and enp0s8 the second one.

Next, edit the /etc/network/interfaces file and put the following content:
# Host only interface
auto enp0s3
iface enp0s3 inet static
        address 192.168.56.20
        netmask 255.255.255.0
        network 192.168.56.0
        broadcast 192.168.56.255

# NAT interface
auto enp0s8
iface enp0s8 inet dhcp
In the first part, we are configuring the enp0s3 ( This represents the first adapter, “Adapter 1” configured in the Virtualbox networks for the VM ). We set it to static and give the IP address in the same range as the vboxnet0. You may change the IP address from 20 to something else, but make sure that the subnet is 192.168.56. After that put the values for the netmask, network and broadcast as in the above snippet.
Next, we configure the NAT interface as enp0s8. This represents the second adapter, “Adapter 2” which was configured as NAT in the VirtualBox. Here we set this to auto using DHCP. This will allow the guest VM to share the internet available from the host system.
As specified before, we used enp0s3 as Host only adapter since Apadater 1 was configured as Host-only adapter is the virtualbox VM configuration. If it was Adapter 2, we would have used enp0s8 instead. Just use the lower number interface as the first adapter connected.
That’s it for the configuration and you just need to restart the VM once to have the interface configuration in effect.
Using the newly configured VM
Now you can use the static IP address ( 192.168.56.20 in above case ) to connect to the VM from the host whenever its running. This will not be changed irrespective of which network you are using.
The second interface we configured ( NAT one ) would provide the internet connectivity using DHCP when your host has internet on any network.
Winding up
The above setup really helps is keeping my local system clean and provides an easy way to run the services required whenever I need. Even though the configuration may look like a handful, its pretty straightforward and will definitely help reduce the overhead and system lag in the long run.
Do let me know your comments and queries in the comments section below.
regards
Microideation


1 Response
[…] I am following a similar setup where I have a Ubuntu 16.04 VM containing Hazelcast, RMQ, Mysql , Docker, ELK stack installed. I start the VM when I am working on the service and will stop the instance when I am done. If you are interested in the VirtualBox setup with a static address ( with internet connectivity across networks ), click here to see the post. […]