Securing Kibana with basic auth using nginx as reverse proxy
We heavily use ELK and especially Kibana for our dashboard requirements. Kibana is not just used for log monitoring, we use custom dashboards using elasticsearch indexes. Kibana by default does not have security enabled and the dashboard and logs can be viewed by anyone who has access to the Kibana host. Enabling kibana security can be done using plugins like a vault. But this requires some configuration and security enabled in the elasticsearch as well. Now in this post, we will see how we can enable the basic authentication using nginx as a proxy and use it to secure the kibana access
Installing and using Kibana
We will not be discussing the installation and setup of the ELK stack or Kibana at length. You may refer to the following links for more details on that.
- Setting up ELK Stack for near real-time log monitoring in AWS
- Analyzing & monitoring application logs using ELK stack
We will assume that you will be running the Kibana service in port 5601.
Configuring nginx as a reverse proxy to Kibana
We require a domain name or subdomain pointing to the nginx server. In case you want to setup a https domain using zero cost letsencrypt service, you can refer to the below link for details:
Sample configuration for the domain
For the sake of simplicity, let’s assume that we have a domain called kibana.example.com and the subdomain pointing to nginx server. We can save this configuration in kibana.example.com.conf file under /etc/nginx/conf.d/ folder.
server {

        listen 80;
        server_name kibana.example.com ,localhost;

        # Handler for the root location
        location / {

                proxy_set_header   X-Real-IP $remote_addr;
                proxy_set_header   Host      $host;
                proxy_set_header   X-Forwarded-For  $proxy_add_x_forwarded_for;
                proxy_set_header   X-Forwarded-Proto $scheme;
                proxy_set_header   X-Forwarded-Host $host;
                proxy_set_header   X-Forwarded-Server $host;
                proxy_pass         http://127.0.0.1:5601;
                proxy_redirect     http://127.0.0.1:5601 http://kibana.example.com;
        }

}
Please note that you need to disable the access to the port 5601 using firewall.
Adding basic authentication
Now we need to add a basic authentication to the configuration. The first step is specifying a .htpasswd file containing the usernames and the password for basic authentication.
For using basic auth, we need to have the httpd-tools available in the system. If the package is not available you need to install the same. You can use the following command in Centos 7 for installing
> sudo yum install httpd-tools
Creating a basic authentication credentials file
As a first step for authentication, we need to have the users and respective passwords specified. We will be using htpasswd utility for doing this. We can use the following command to create a user in the specified htpasswd file path.
sudo htpasswd -c /etc/nginx/.htpasswd user1
The command will prompt you to enter the password for user1 and you can add it. You may specify a different file name as well. But you need to note it so that we can use it in the nginx configuration later.
Please take a note of the -c flag. This is only required when you are creating the password file for the first time. Later on, if you want to set a password for a different user, you should skip the -c flag and use the following command:
> sudo htpasswd /etc/nginx/.htpasswd user2
If you don’t skip the -c flag, it will create a new file each time and you will lose the users you had created before.
Using the basic authentication file in nginx conf
Once the users are created, we could go ahead and tell the nginx conf to use the basic authentication file. You can specify this configuration for the whole domain or for sections like a location. The kibana.example.com.conf file can be modified like below for enabling the basic authentication to root location.
server {

        listen 80;
        server_name kibana.example.com ,localhost;

        # Handler for the root location
        location / {

                proxy_set_header   X-Real-IP $remote_addr;
                proxy_set_header   Host      $host;
                proxy_set_header   X-Forwarded-For  $proxy_add_x_forwarded_for;
                proxy_set_header   X-Forwarded-Proto $scheme;
                proxy_set_header   X-Forwarded-Host $host;
                proxy_set_header   X-Forwarded-Server $host;
                proxy_pass         http://127.0.0.1:5601;
                proxy_redirect     http://127.0.0.1:5601 http://kibana.example.com;

                # Enable auth basic with a message for the dialog
                auth_basic "Please provide username and password";

                # Set the file where the basic auth credentials are stored
                auth_basic_user_file /etc/nginx/.htpasswd;
        }

}
In case you used a different file for the credentials, you need to use the same filename for auth_basic_user_file param.
Restart the nginx service after the configuration changes are done and you are all set.
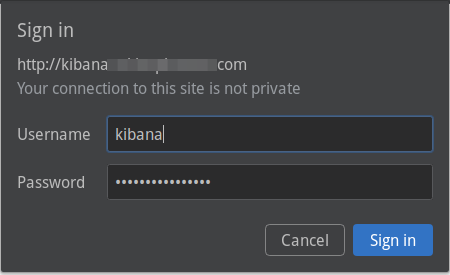
Now when you try to access kibana.example.com, you would receive a message box like below. You should be able to enter the username and password configured in the credentials files and access the dashboard.
Conclusion
I know that basic authentication is not the strongest or the recommended scheme out there. But this does provide a basic security to a rather insecure setup.
Let me know your questions and comments in the section below.
regards
Microideation