Setup a local development proxy using Nginx handling CORs
If you are a front-end developer, you must be familiar with the pain of connecting to the API when working on your development machine. You may be running a local npm server and the API is on a different service ( or port ) running locally or remotely and the browser starts giving error for the CORs ( cross-origin requests ). This is due to the difference in the URL where the UI is served and where API is hosted ( even different port ). Although it is a security feature for browsers, it can become a pain during development.

In this post, we will see how to setup an Nginx based local proxy in the Ubuntu system. This can be done in the Windows systems as well.
Objective
Our aim is to set up a local hostname and configure the paths proxying to different services ( API ) and the user interface. For example, we are planning to have a local domain like “http://develop.microideation.local” to proxy the UI and then the API as http://develop.microideation.local/mockserver
Setup the hostname
The first step is to setup a hostname “http://develop.microideation.local”. For the local system to resolve this domain, we need to add this to the system’s host file.
NOTE: Replace “develop.microideation.local” with any local domain name you want. Make sure that you use a domain that ends with “.local”. If the domain does not end with “.local”, then Chrome browser will not resolve it to local and will give an error as “404 Not found”.
Linux based system
For Linux based systems, it needs to be added in the /etc/hosts file. Edit the file in your favorite editor ( You need to be an administrator ).
sudo vim /etc/hosts
Add the following entry to the line ( “127.0.0.1 develop.microideation.local”)

Windows-based system
For windows based system, Open Notepad as administrator and open the file
c:\Windows\System32\Drivers\etc\hosts
Add the following entry to the line ( “127.0.0.1 develop.microideation.local”)
Nginx Setup
The next step is to configure Nginx for resolving the domain and then proxy to the respective API or UI location. We will not be covering Nginx installation in this blog as there are enough resources available online for the respective operating systems.
Domain configuration file
Create a file “develop.microideation.local.conf” under “/etc/nginx/conf.d” folder ( in Ubuntu ). Add the following content in the file.
Note: You need to replace “develop.microideation.local” with the value you specified in the /etc/hosts file. Change filename also based on the domain.
server {
      listen 80 ;
      server_name develop.microideation.local;

 # Proxy for react js UI
 location / {
     # following lines are required for websocket
    proxy_http_version 1.1;
    proxy_set_header Upgrade $http_upgrade;
    proxy_set_header Connection "Upgrade";
    proxy_set_header Host $host;

    # This for actual proxy pass
    proxy_pass http://localhost:3000;
 }

 # Proxy for the mock server
 location /mockserver {
     proxy_pass http://localhost:8080;
 }
}
The configuration file should be as below. Save and close the editor.
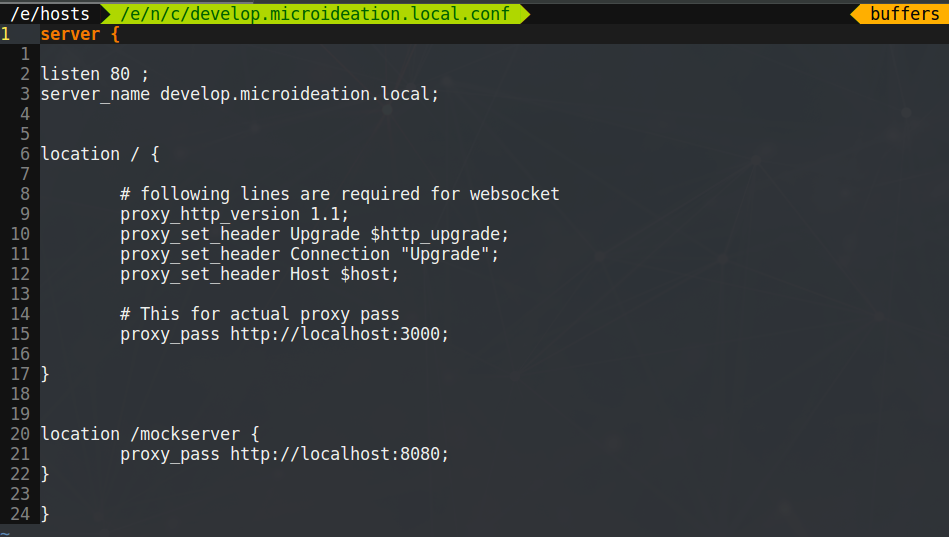
In the above configuration file, we are setting the Nginx to listen to 80 with server_name as “develop.microideation.local”. The first location configuration proxies to the npm server for ReactJS ( localhost:3000 ).The second configuration proxies to an API mock server running at localhost:8080. Like this, you can configure any path proxying to any service.
Restart the Nginx service after updating the configuration.
sudo service nginx restart
Accessing the proxies URLs
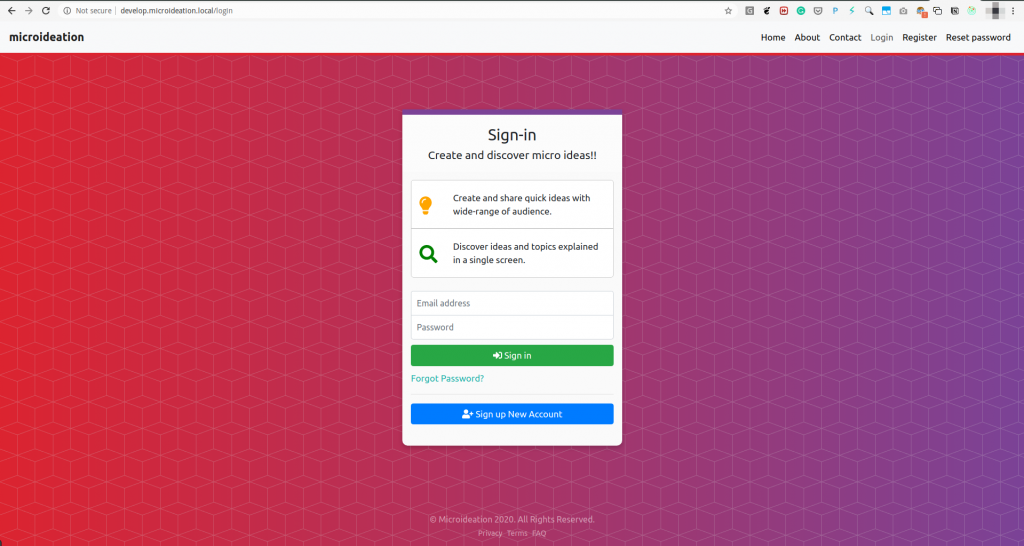
After Nginx is successfully restarted, we can head to the browser and put in the local domain configured in the address bar. Please use “http://” in the beginning.
NOTE: First-time Chrome will take you to the google search page, but you will be able to find a message at the top asking whether you want to visit the link instead. Click in there to access the link.
If you visit the /mockserver location we configured, it will proxy call to the service running at 8080
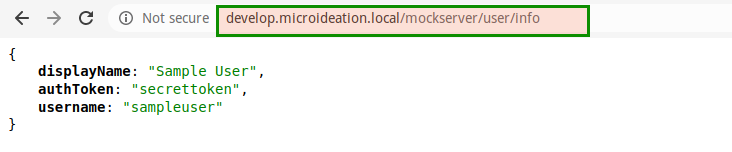
Now you can configure the API URL in ReatJS or any other front-end service without getting the CORS issue.
Footnotes
This Nginx proxy setup in the local system allows us to setup any number of domains and map the services requires under a single domain. This can help reduce the CORS issue while consuming any service or API from the local.