Configuring AWS ECR as docker registry in Centos server
Docker is a widely popular container system and most of the modern systems use Docker for scalability and maintainability. One of the main points of consideration while moving to docker is the registry. Registry is where we would be storing our docker images. The registry needs to be accessible, available and secure.
What is AWS ECR?
AWS ECR ( Elastic Container Registry) is a managed pay as you use Docker registry service provided by Amazon Web Services. ECR provides extensive configurability and scalability to your docker registry. You can have unlimited docker images hosted and is only charged for the bandwidth and storage incurred by the images.
Why use AWS ECR?
Docker already provides a managed registry as DockerHub ( hub.docker.com ). You can have unlimited public repositories, but the free plan can only have 1 private repository. Also, they have different plans which are suited for teams of different size. Now one issue with docker hub is that the pricing is per private repository and also if you have your servers hosted in AWS, there will be bandwidth charges when the pulling and pushing from docker hub to AWS instances.
If you have your majority of infrastructure running in AWS, ECR is a more cost efficient registry.
- No limit on the number of repositories
- Only charged for the bandwidth usage and storage
- Reliability, Scalability and Accessibility backed by the proven AWS Infra
- No bandwidth charges when the traffic between instances and docker register is within the same region.
Configuring AWS ECR
The configuration of ECR for our usage is pretty simple and straight-forward. You can search for ECR in the services section and will be presented with a screen like below:
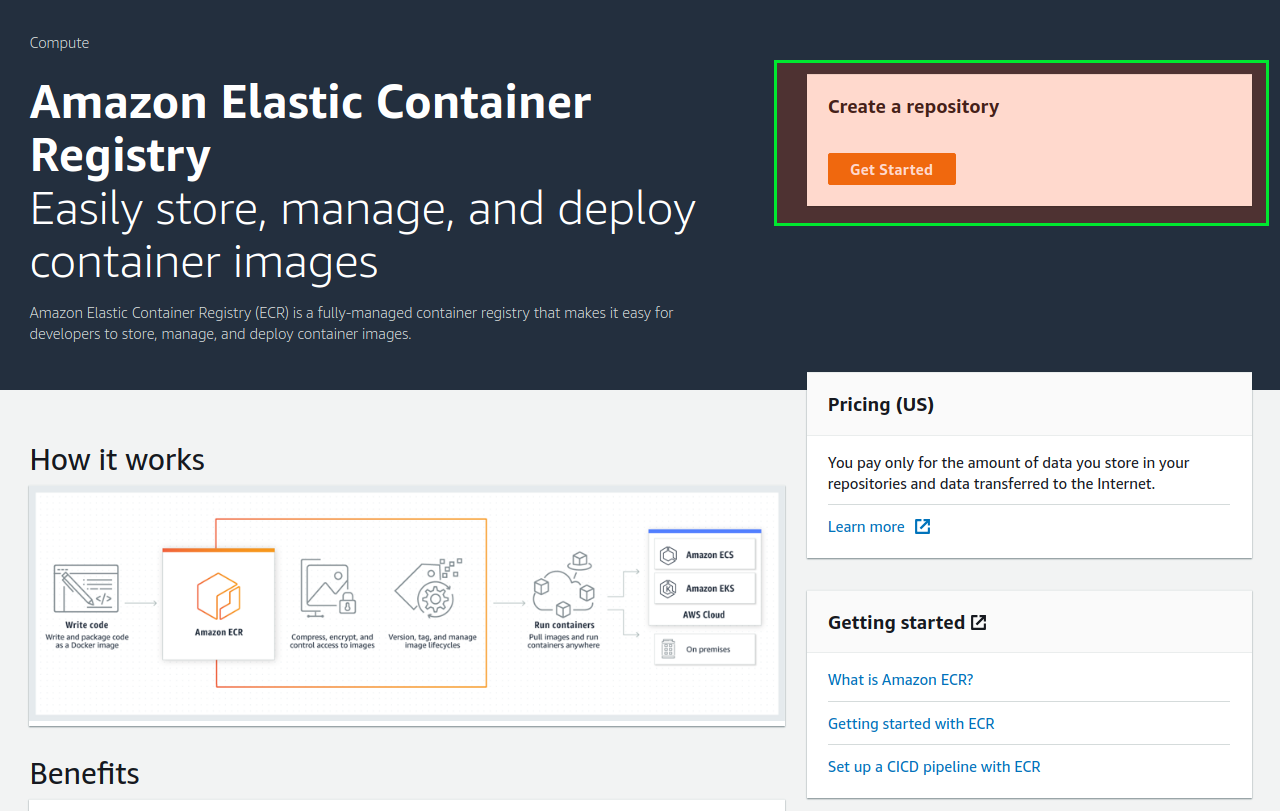
Click on the ‘Get Started’ and you will be presented with a screen for creating the repositories. Now, each repository should represent a single service ( in case of microservices ) or image type. It’s possible to manage multiple services/image types with some creative tagging process. But you would find it pretty clumsy after some time.
Creating a Repository for docker image
When you click on the ‘Get started’, you will be presented with a screen to create a repository and will be asked for a name. Provide a name that resembles the name of the service. This will be the name of the image.
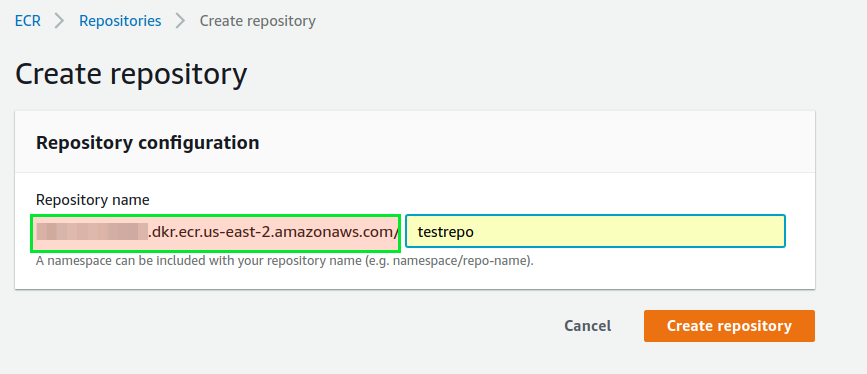
You can see that I have given ‘testrepo’ as the name of the image. The section which is highlighted in green is called the name-space and this will be unique for your account. This can be also called your docker registry URL. So you could refer to your repo uniquely from anywhere using the following syntax: namespace/reponame:tag
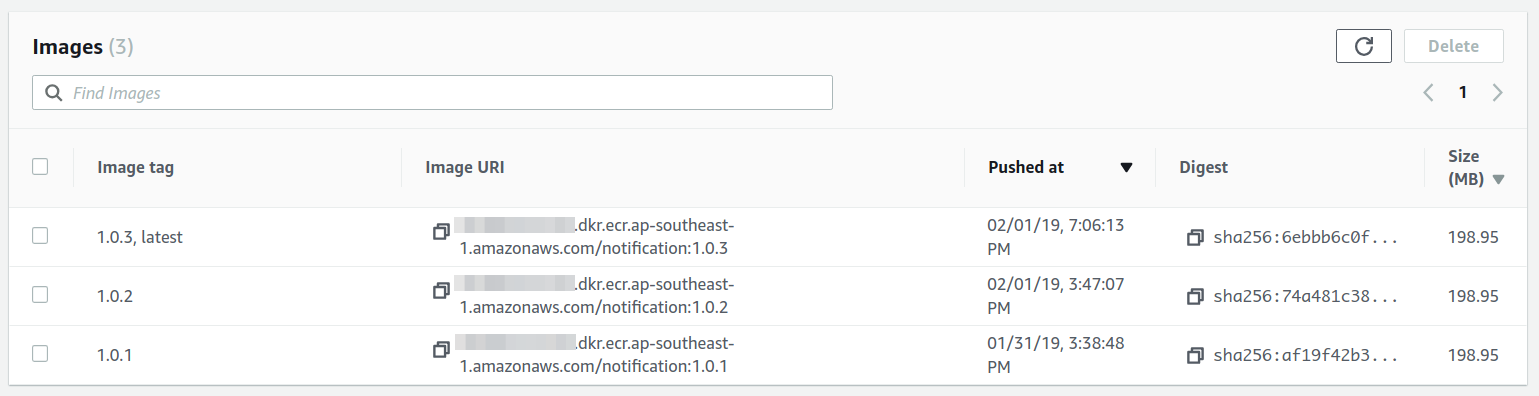
Once you create a repository, you will be taken to the screen listing the created repositories and can see the repos and their corresponding URLs

When you click on a particular repo, you will be taken to the respective repository page and will be able to see the different images with tags and the complete URL referring to the push along with the other details of the push.
Connecting to AWS ECR
Once we have a repository created, we obviously want to be able to push images to the registry. Moreover, we would want this to be configured in our CI / CD server so that the automated docker builds can be pushed to the registry.
To connect to the AWS registry you need to authenticate using an AWS IAM user credentials. Let us see how we can create an IAM user with access rights to push images to the registry.
Create an IAM Group and User for ECR access
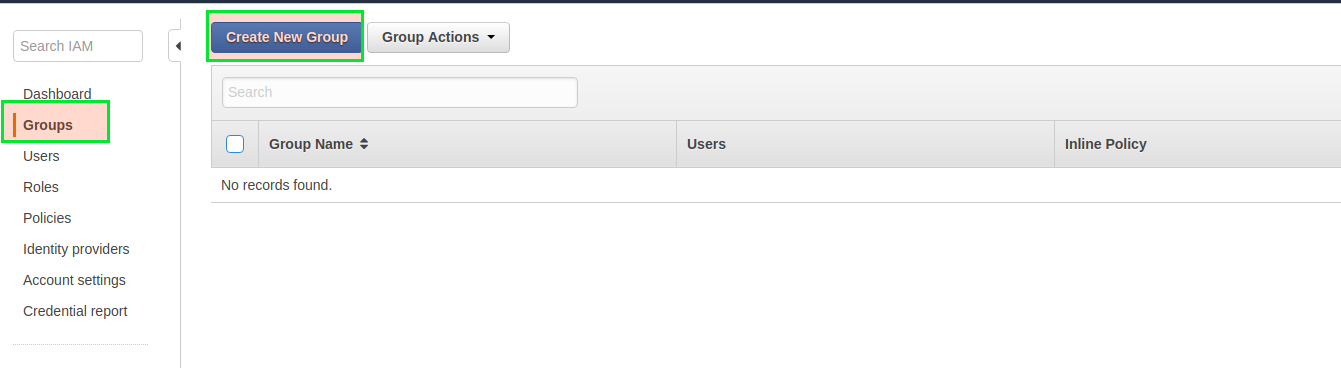
Head to the Services -> IAM . Click on the ‘Groups’ menu on the left-hand side and then on the ‘Create New Group’ button at the top.
- Provide the group name as ‘ecr-users’
- Click on Next and you will be asked to select policies applicable in this group. Type ‘container’ in the search box and the policies will filter for the ECR

- Choose the applicable policy for the group. You can have full access, read-only and power user ( restricted access ). I have chosen power user access so that I can push as well as pull from the repository.
- Review and Create the Group
You can have individual user restricted to certain repositories only by going to the policies section of the respective repository. By defaulf, the user under this group will be having access to all the repositories.
Creating a user with the above group
Now that the group is created, let’s create a user under this group.
Head to the Services -> IAM. Click on the ‘Groups’ menu on the left-hand side and then on the ‘Add User’ button at the top.
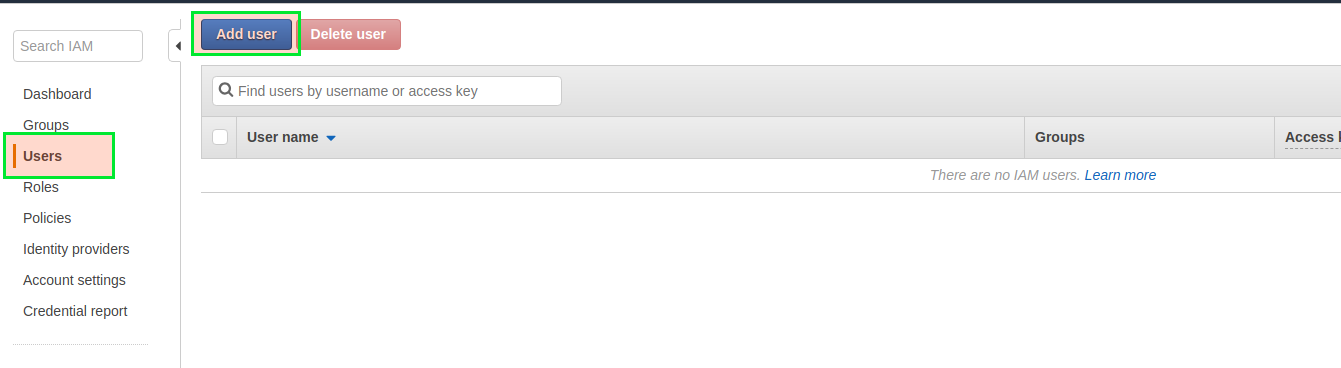
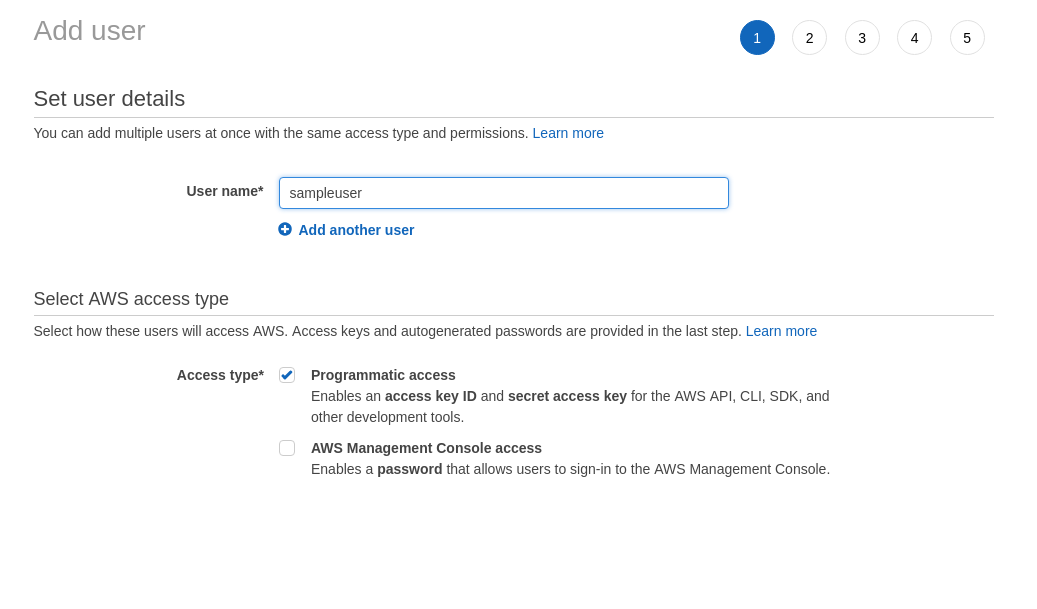
- Provide a username for the user
Select the AWS Access type as ‘Programmatic access’. This required for the users interacting using AWS CLI
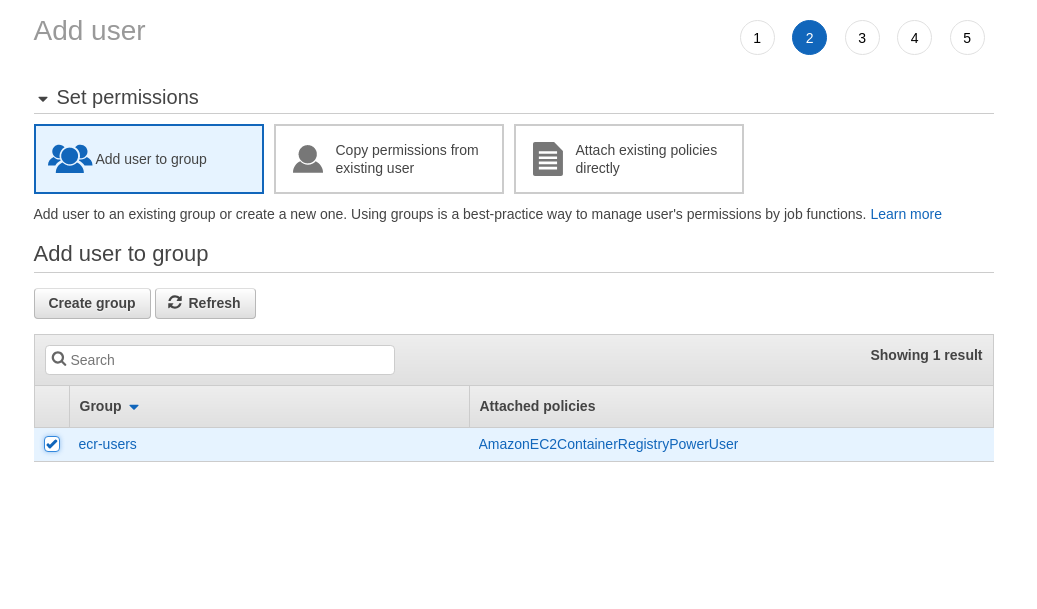
- Click on Next and will be asked to set the permissions.
Here we can choose to add the user to a group and select the ‘ecr-users’ group created before
- Add any tags that you want to specify for identifying the user
- Review the configuration
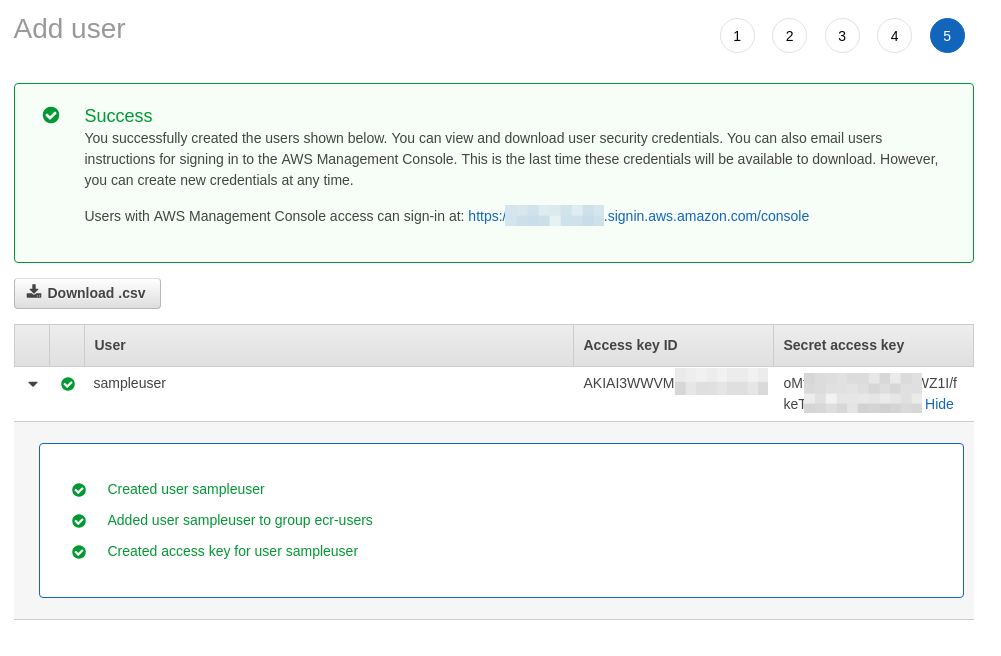
- Click on ‘Create user’
- You will be presented with a screen showing the details of the user and you need to note down the Access ID and the Secret Key for the user.
Now that we have created the user and given the permission, we can see how to use the same in a Centos server running docker for pushing and pulling images from the AWS ECR.
Configuring AWS ECS on CentOS
CentOS or for that matter any operating system requires the AWS CLI ( CommandLine Interface ) for interacting with the AWS services. So the first step would be installed and set up the AWS CLI in our system.
Install and configure AWS CLI
The easiest way to install AWS CLI is using pip install. In case pip is not available, please install pip before proceeding with the below step.
- Run in terminal
> pip install awscli –upgrade –user
This will install aws cli for the current user. Please note that if you used sudo for installing, it will be only available for root user. - Run aws configure command to configure
> aws configure - This will ask for the following details
- Access ID ( Received from the final screen of user setup )
- Access Secret ( Received from the final screen of user setup )
- Default region ( You may leave this empty or can provide your region code from below link )
https://gist.github.com/neilstuartcraig/0ccefcf0887f29b7f240 - Default output format ( You may leave this blank or provide JSON as value )
- Run the command to login into AWS ECR.
> $(aws ecr get-login –no-include-email –region ap-southeast-1)
NOTE: You need to replace-southeast-1 to your region under which the ECR is provisioned in AWS. - This should give you a command like ‘Login Succeeded’
Please note that you need to run the aws ecr-get-login command in a server where docker is already installed and running.
Pushing an image
With our AWS ECR user logged in and ready to go, we can tag the build first using below command:
- docker tag <registryurl>
After the build is tagged, we can push the image using below command
- docker push <registryurl>
<registry-url> can be obtained using the repositories section. You can go the respective repo and get the url.
After the image is pushed, you can go to the repository and can see the latest image listed there. The latest push will be also tagged as ‘latest’ automatically by ECR.
Pulling the image
The image can be pulled using the docker command and the registry URL for the respective image.
- docker pull <registry-url>
Conclusion
We have seen how to configure the ECR and then create an IAM user that can be authenticated to push and pull the images. When we have the infrastructure already hosted in AWS, it makes more sense to have the registry also hosted there to reduce the cost.
Let me know if you have any queries or questions.
regards
S


2 Responses
[…] blog.microideation.com Ref. https://gist.github.com/neilstuartcraig/0ccefcf0887f29b7f240, […]
[…] blog.microideation.com Ref. https://gist.github.com/neilstuartcraig/0ccefcf0887f29b7f240, […]