Adding nested fields ( objects in array ) query support to Kibana using KNQL plugin
We extensively use ELK ( Elasticsearch, Logstash & Kibana ) for our logging requirements as well as for dashboards. One of the major constraints we have faced while using Kibana was the limitation of querying an index with the nested object array. Also, Kibana does not gracefully display the nested object data in the Discover tab. In this post, we are going to see how to manage nested object array and include the nested object fields in our queries.
Nested objects
Nested objects are objects inside an elasticsearch document. For eg: a Sale is a document object and line item is a list containing objects of type LineItem. We can define a nested object in the following manner.
@Document(indexName="sale", type="Sale")
public class Sale {

   @Id
   public String orderNo;

   public Date date;

   public Double amount;

   public String reference;

   @Field(type = FieldType.Nested)
   public List<LineItem> lineItems = new ArrayList();
}


public class LineItem {

   public String itemCode;

   public String itemName;

   public Double qty;

   public Double price;
}
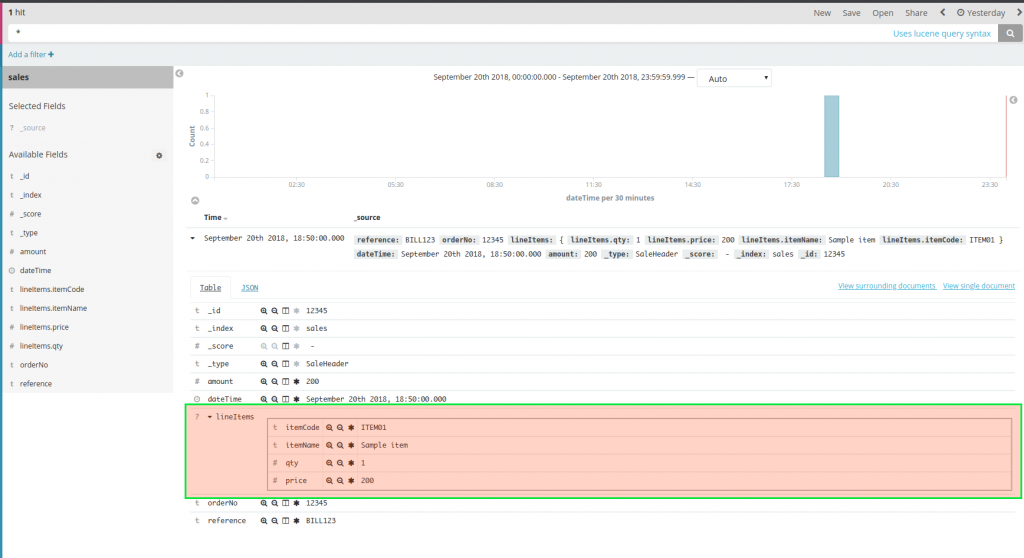
In the above code, the lineItems is a list of LineItem object. When we add this to the kibana, it will be displayed as an unknown object.
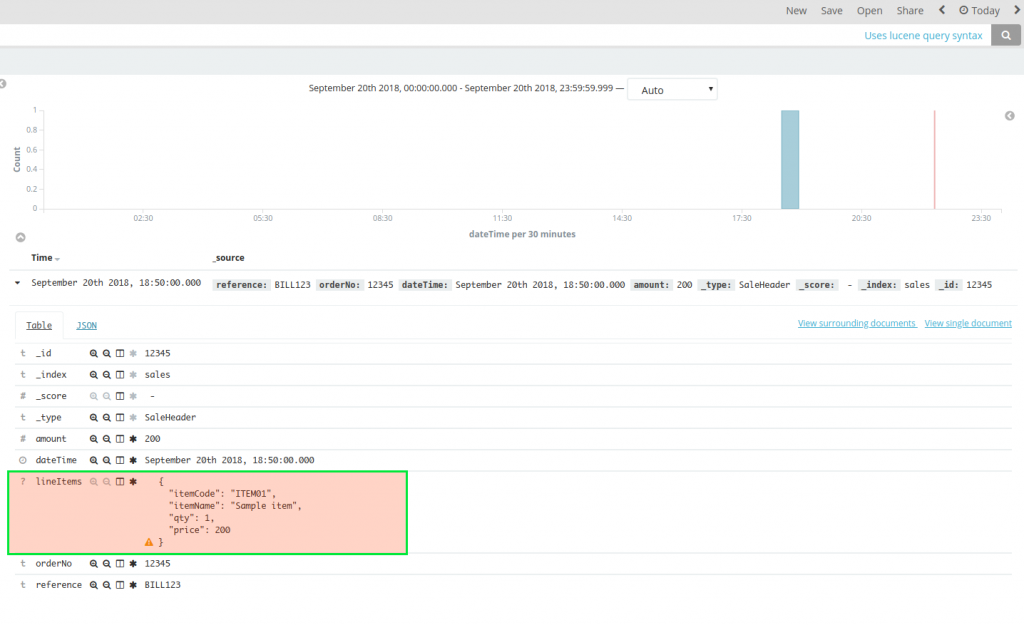
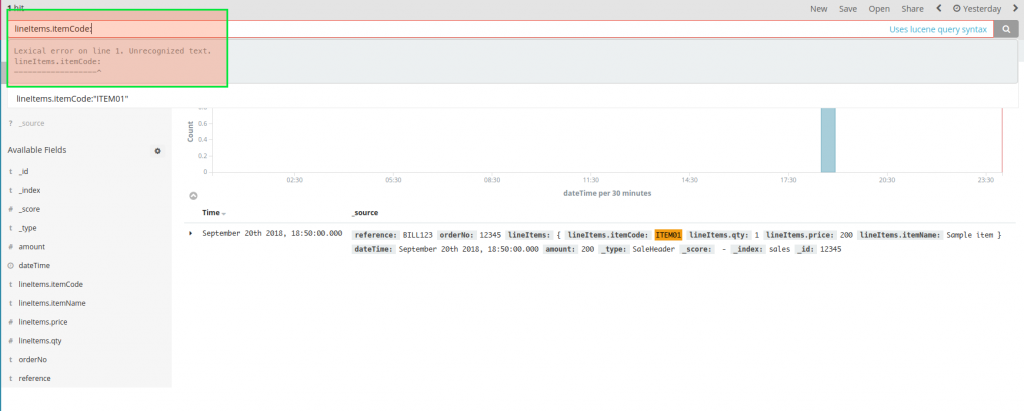
When the nested fields contain an array of object, we cannot make a query like lineItems.itemCode:”ITEM01″ or to get the sum of a particular item code.
Adding support for the nested fields in Kibana
We had a lot of requirements for a nested array of objects in Kibana. But the lack of support in the dashboard was a major set back.
That’s when we found a great plugin called KNQL Plugin which provides support for the nested array of objects in the Kibana. We will see how we can add this to our Kibana instance and use nested objects in the queries.
MICROIDEATION APP: Programming and tech topics explained as quick learning cards ( ideations ) .
We have launched our new mobile app for learning programming and other tech-based topics in under 30 seconds. The content is crafted by subject-matter-experts on the field and each topic is explained in 500 or fewer characters with examples and sample code. You can swipe for the next content or freeze and follow a particular topic. Each content is self-contained and complete with links to related ideations. You can get it free ( no registration required ) in the play store now.
Installing the plugin
The first step for enabling nested fields is to download and install the KNQL plugin. Head to the following location.
https://ppadovani.github.io/knql_plugin/installation/
Check the version of your kibana and copy the download link for the corresponding version.
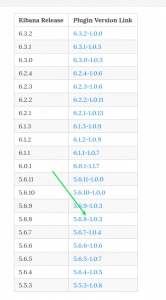
Now you need to go to the installation location of the Kibana folder and then move to the bin folder. Now execute the following command:
./kibana-plugin install <link copied>
After the installation is completed, you need to restart the Kibana instance and then access the web portal. Now goto the Management section and you should be able to see a new tab called ‘Nested Fields’ there as below:

Enabling nested fields on Index
The indexes you have configured in Kibana are not enabled for nested fields by default. You need to go to the respective indexes and enable them. For doing that, go to Management -> Nested fields. All your configured indexes would be listed out there. There would be a checkbox against each index to enable nested field for the respective index.

Click on the checkbox to enable the nested fields. This would change the nested enabled for the index as in the picture below:

Checking the nested fields
We can verify the nested fields by going to the Discover tab and then selecting the index. When you list the entries in the tab, the nested fields will be indicated separately. You will be able to see the formatted entries in your object array field as in the image below:
Using nested fields in queries and visualizations
Its very important to note that when you enable nested fields for an index, the query language will get changed to KNPL query format. The search bar on the top will give you directions on the format of the query format when you start typing as below:
Changes in query format for KNQL plugin
Following are the major changes in the query format when using the KNQL plugin.
- Normal Lucene syntax uses ‘:’ for the condition whereas KNQL plugin uses ‘=’ ( like in SQL )
For eg: where you were using amount: “300” will be changed to amount=”300″
Please note that this change is for all the fields irrespective of whether the field is a nested object or not. - The KNQL plugin will only compare the textual data provided in the lower case letters.
For eg: If you are searching by reference, you need to make sure that the value is all provided in lowercase. In the above screenshot, the reference value is BILL123. While using with KNQL plugin you need use like below:
reference=”bill123″
NOTE: I am not sure if this is something to do with the version of KNQL plugin we were using ( KNQL for 5.6.8 Kibana ). If you are not facing this issue, please let me know in the comments.
Using the nested fields in the visualizations
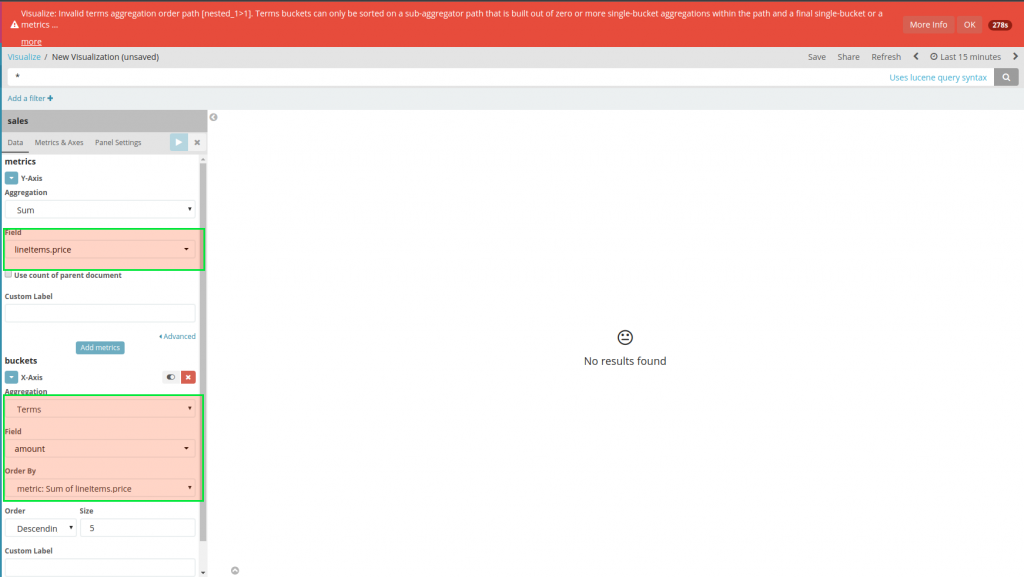
The nested fields can be used in the visualizations like any other fields. But need to consider the format changes discussed above. Also please note that if you have used a nested field as aggregation in the higher level, you cannot use the normal field as aggregation further down.
Eg: When you are using the price of lineitem in the primary aggregation of a vertical bar chart, you cannot use the amount field in the sub-aggregation.
Wrapping it up
Kibana is a powerful visualization tool and the KNQL plugin will help enable a much-needed support for the nested array objects when you plan to extend Kibana for non-conventional dashboards.
In case you are interested in further reading on ELK stack, you could refer to following:
Let us know your thoughts and queries in the comments section.
regards
MicroIdeation
